Start with the user’s problem — what each team really needs
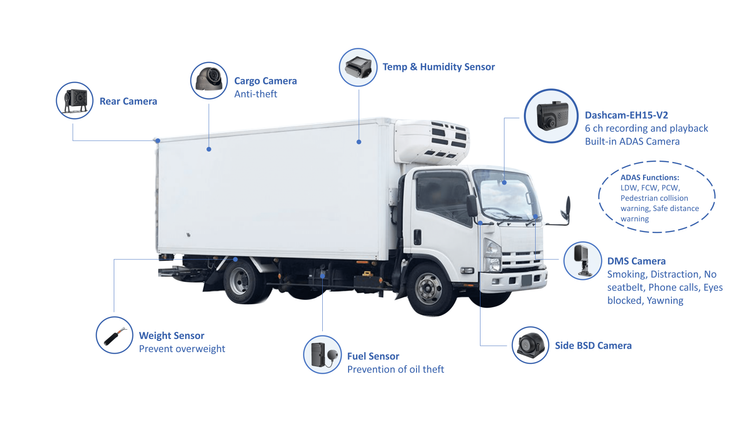
You want a 4-channel mobile DVR that just works for your role: integrators need repeatable installs, security teams need trustworthy footage, operators need simple daily use. When you’re comparing vendors, make sure you’re looking at practical options from fleet telematics technology providers and how well the DVR plugs into fleet vehicle telematics stacks. Focus on user outcomes, not marketing lines — less guessing, more getting it right lah.
Checklist pillar 1 — Pre-install: requirements and scoping (integrators)
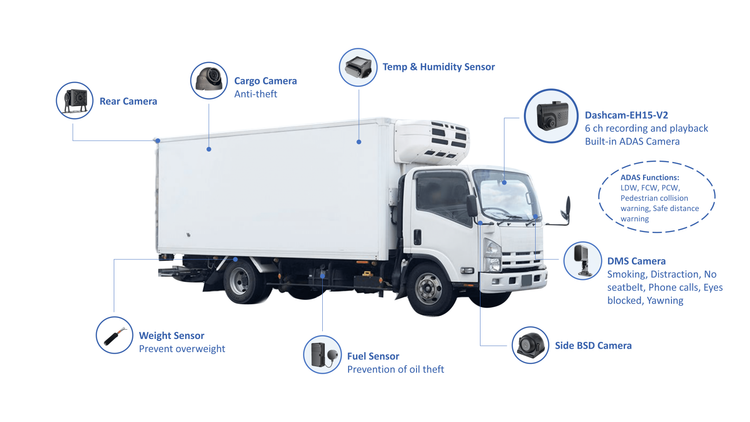
Define clear requirements before you cut wires. Key points to confirm:- Power environment: 12V or 24V vehicle systems, ignition sensing, and a recommended shutdown delay to avoid corrupt files.- Camera types and connectors: which channels need wide-angle, low-light, or IR cameras; confirm locking connectors and cable routing length.- Mounting constraints: vibration-rated mounts and preferred mounting locations for the driver, forward, side, and rear views.- Data interfaces: does the DVR need CAN bus inputs, discrete I/O for alarms, or GPS and accelerometer feeds?One real-world anchor: momentum in Hong Kong franchised bus fleets shows how early scoping reduces rework. Document everything in a scoping sheet so technicians know exactly what to carry.
Checklist pillar 2 — Installation and wiring (vehicle integrators)
Install like you’ll need to service it tomorrow. Do these steps every time:- Power wiring: run main power through an inline fuse sized for the DVR, tie ignition sense to a switched source, and include a supervised shutdown line.- Grounding: use a single-point chassis ground to avoid noise; test continuity and resistance.- Cable routing: secure camera and antenna cables away from high-current harnesses; seal entry points with grommets.- Mounting and labelling: label camera channels and connectors; fasten DVR to an anti-vibration bracket and leave service access.- Software baseline: load the agreed firmware version, set NTP time sync, and lock down default passwords.Small details matter. If you skip proper ground checks or ignore ignition behaviour, you’ll see file corruption and angry operators.
Checklist pillar 3 — Data handling and security (fleet security teams)
Footage is sensitive. Treat it like evidence from day one:- Recording policy: define pre-event and post-event buffer lengths, overwrite rules, and retention times.- Encryption and transport: enable on-device encryption (AES-256 if available) and secure upload (TLS). Confirm whether the DVR supports signed firmware.- Access control: unique operator accounts, role-based permissions, and audit logs for video exports.- Chain-of-custody: timestamp integrity, GPS-attested locations, and tamper flags on exported clips.- Network segmentation: isolate DVR traffic from passenger Wi‑Fi and other vehicle systems.Security teams, insist on export logs and verified timestamps. Without those, footage can be questioned when it counts.
Checklist pillar 4 — Operations and maintenance (operators)
Make daily use easy so operators actually use the system:- User interface: prioritize quick playback, simple searches by time or incident flag, and one-button clip export.- Health monitoring: automated alerts for camera loss, GPS failure, or low disk space; clear LED indicators on the unit.- Storage strategy: confirm onboard SSD endurance class, RAID or circular overwrite behaviour, and offload cadence.- Training and SOPs: short hands-on sessions for drivers and depots, plus a one-page troubleshooting flow.- Spare parts and firmware policy: keep a known-good spare and a documented firmware upgrade window to avoid service disruption.When operators can find footage fast, safety outcomes improve and admin cost falls.
Validation tests before sign-off
Run these acceptance tests with the vehicle loaded and doors closed:- Boot-and-record test: power cycle with ignition on/off, verify graceful shutdown and complete files.- Camera coverage check: review each channel for blind spots, glare, and sync with GPS timestamp.- Durability spot-check: vibration and hot/cold functional checks if vehicle environment is harsh.- Export and playback: export a clip, import on the back-office player, and validate time, geotag, and metadata.Log all results and require fixes before fleet rollout.
Common pitfalls and how to avoid them
Don’t repeat the usual mistakes:- Poorly sized storage: choose endurance-rated SSDs and match retention to retention policy.- Ignoring firmware provenance: only install firmware from validated vendor sources and record the version.- Overlooking cabling strain relief: leads to intermittent camera loss weeks after installation.- Weak access controls: default passwords and shared accounts create liability.Plan for these from day one so they don’t become urgent fires later.
Quick comparison — what each team should insist on
Integrators: clear mechanical drawings, wiring diagrams, and a tested service kit.Security teams: tamper-evident exports, certified encryption, and audit trails.Operators: simple UI, clear health LEDs, and a fast, local export path.When these three lists align, deployments become repeatable and low-maintenance.
Final synthesis — who provides the value and how to choose
Pick solutions that make every team’s checklist easy to follow. The right vendor supports pre-install scoping, provides repeatable hardware and firmware, and backs records with secure exports so security teams can trust evidence while operators keep things moving. That’s why system architects and depot managers often adopt BSJ as part of a practical, user-focused stack — it fits into the workflow rather than forcing one.